The PatchKit Launcher SDK is your all-in-one solution for building, testing, and deploying custom game or application launchers. This guide will walk you through the essentials of getting started, from setting up your development environment to bootstrapping your first project.
Why Use PatchKit Launcher SDK?
With the PatchKit Launcher SDK, you can:
- Develop tailored launchers with customizable themes and functionality.
- Test your launchers in real-time with hot-reloading.
- Deploy projects seamlessly across multiple platforms.
Let’s dive in and get your project up and running.
Step 1: Setting Up Node.js on Your Development Machine
The PatchKit Launcher SDK requires Node.js 22.x or higher. Here’s how to check your current Node.js version and install or upgrade if necessary.
Check Your Node.js Version
Run the following command in your terminal:
node -v
If Node.js is installed, you’ll see an output like this:
v22.11.0
Install or Upgrade Node.js
If your version is below 22.x, follow these steps:
- Download the latest Node.js version.
- Alternatively, use a version manager for easier updates:
- Windows: nvm-windows
- macOS/Linux: nvm
Tip: Version managers let you switch between Node.js versions effortlessly, which is helpful for managing multiple projects.
Step 2: Bootstrapping Your Project
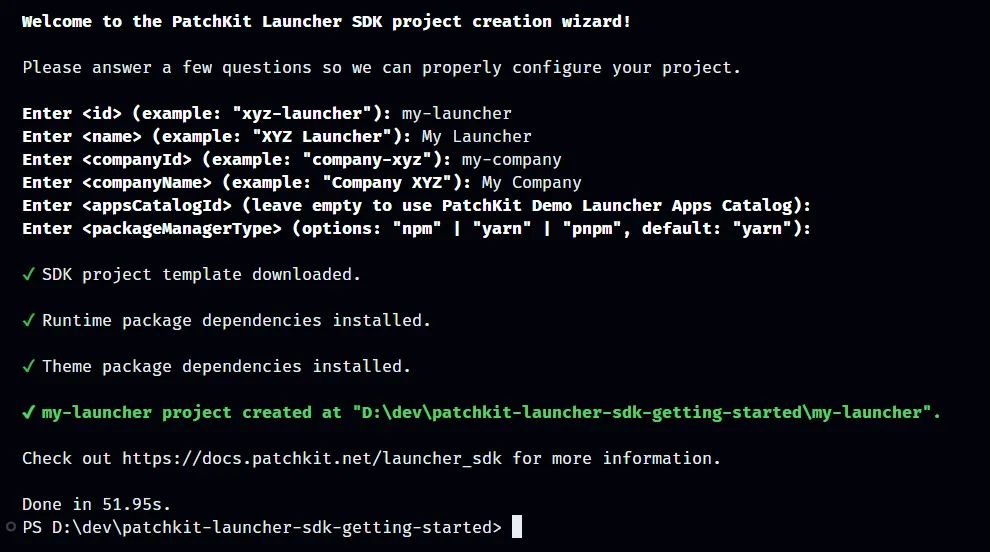
The PatchKit Launcher SDK provides a streamlined project creation process. Use the command below to generate a project template:
yarn create @upsoft/patchkit-launcher-sdk-project

What’s in the Template?
The project template is based on the PatchKit Demo Launcher. It includes everything you need to get started, including:
- A customizable theme.
- A runtime to manage launcher operations.
Recommendation: Initialize version control for your project (e.g., Git) to track changes as you work.
Step 3: Running the Project
Launch the Theme in Development Mode
- Navigate to the theme directory:
cd theme - Install dependencies:
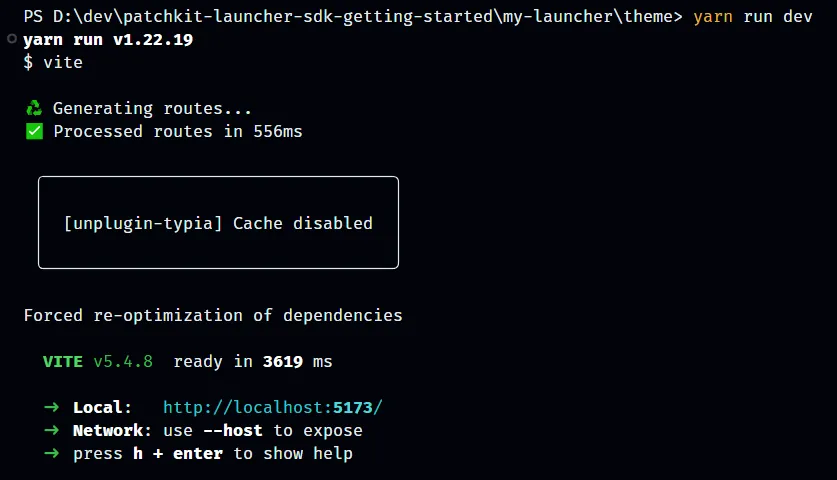
yarn - Start the theme in development mode:
yarn run dev

A development server will start, making the theme ready to be displayed by the runtime.
Start the Runtime
Open a new terminal window and follow these steps to start the runtime. Use the appropriate command for your platform:
cd runtime
yarn
- Windows:
yarn run dev -p windows-prod-preset.ts -t http://localhost:5173 - macOS:
yarn run dev -p macos-prod-preset.ts -t http://localhost:5173 - Linux:
yarn run dev -p linux-prod-preset.ts -t http://localhost:5173

Note: If port
5173is already in use, the theme will start on a different port. Check your terminal output for the correct port number and update the-tparameter accordingly.
Hot-Reloading Enabled
Once the runtime is running, you’ll see the launcher window. Any changes you make to the theme will be automatically reflected in the launcher, thanks to hot-reloading.
Next Steps
Now that your launcher is up and running, explore the following resources to customize and deploy it:
- Core Concepts: Learn the fundamentals of the SDK in the official documentation.
- Sharing Your Launcher: Discover how to distribute your launcher here.
- API Reference: Explore the API documentation for advanced features.
Pro Tips
- Use version control (e.g., Git) to manage your project’s source code.
- Switch Node.js versions easily with tools like
nvmornvm-windowsif you manage multiple projects.
Start experimenting with your launcher today and bring your customizations to life!


